What comes to mind when you think of a smart home? Wi-Fi enabled light bulbs, video doorbells, cloud-connected robot vacuums, or smart fridges perhaps? Brands like Google/Nest or everything enabled with Amazon’s Alexa? While often providing some genuine convenience, these devices are also usually designed to invite and lock users into manufacturers' ecosystems. Create a cool piece of hardware, you’ll make one sale. Create a cool piece of hardware that extracts recurring monthly service fees for cloud storage or to unlock extra functionality, and you’ll have sales for life.
Compounding our collective frustration, these ecosystems are often incompatible with each other and require multiple different apps for control. Not only are subscriptions and upselling part of the game, the underlying business models for these products are built around planned obsolescence and mining user data.
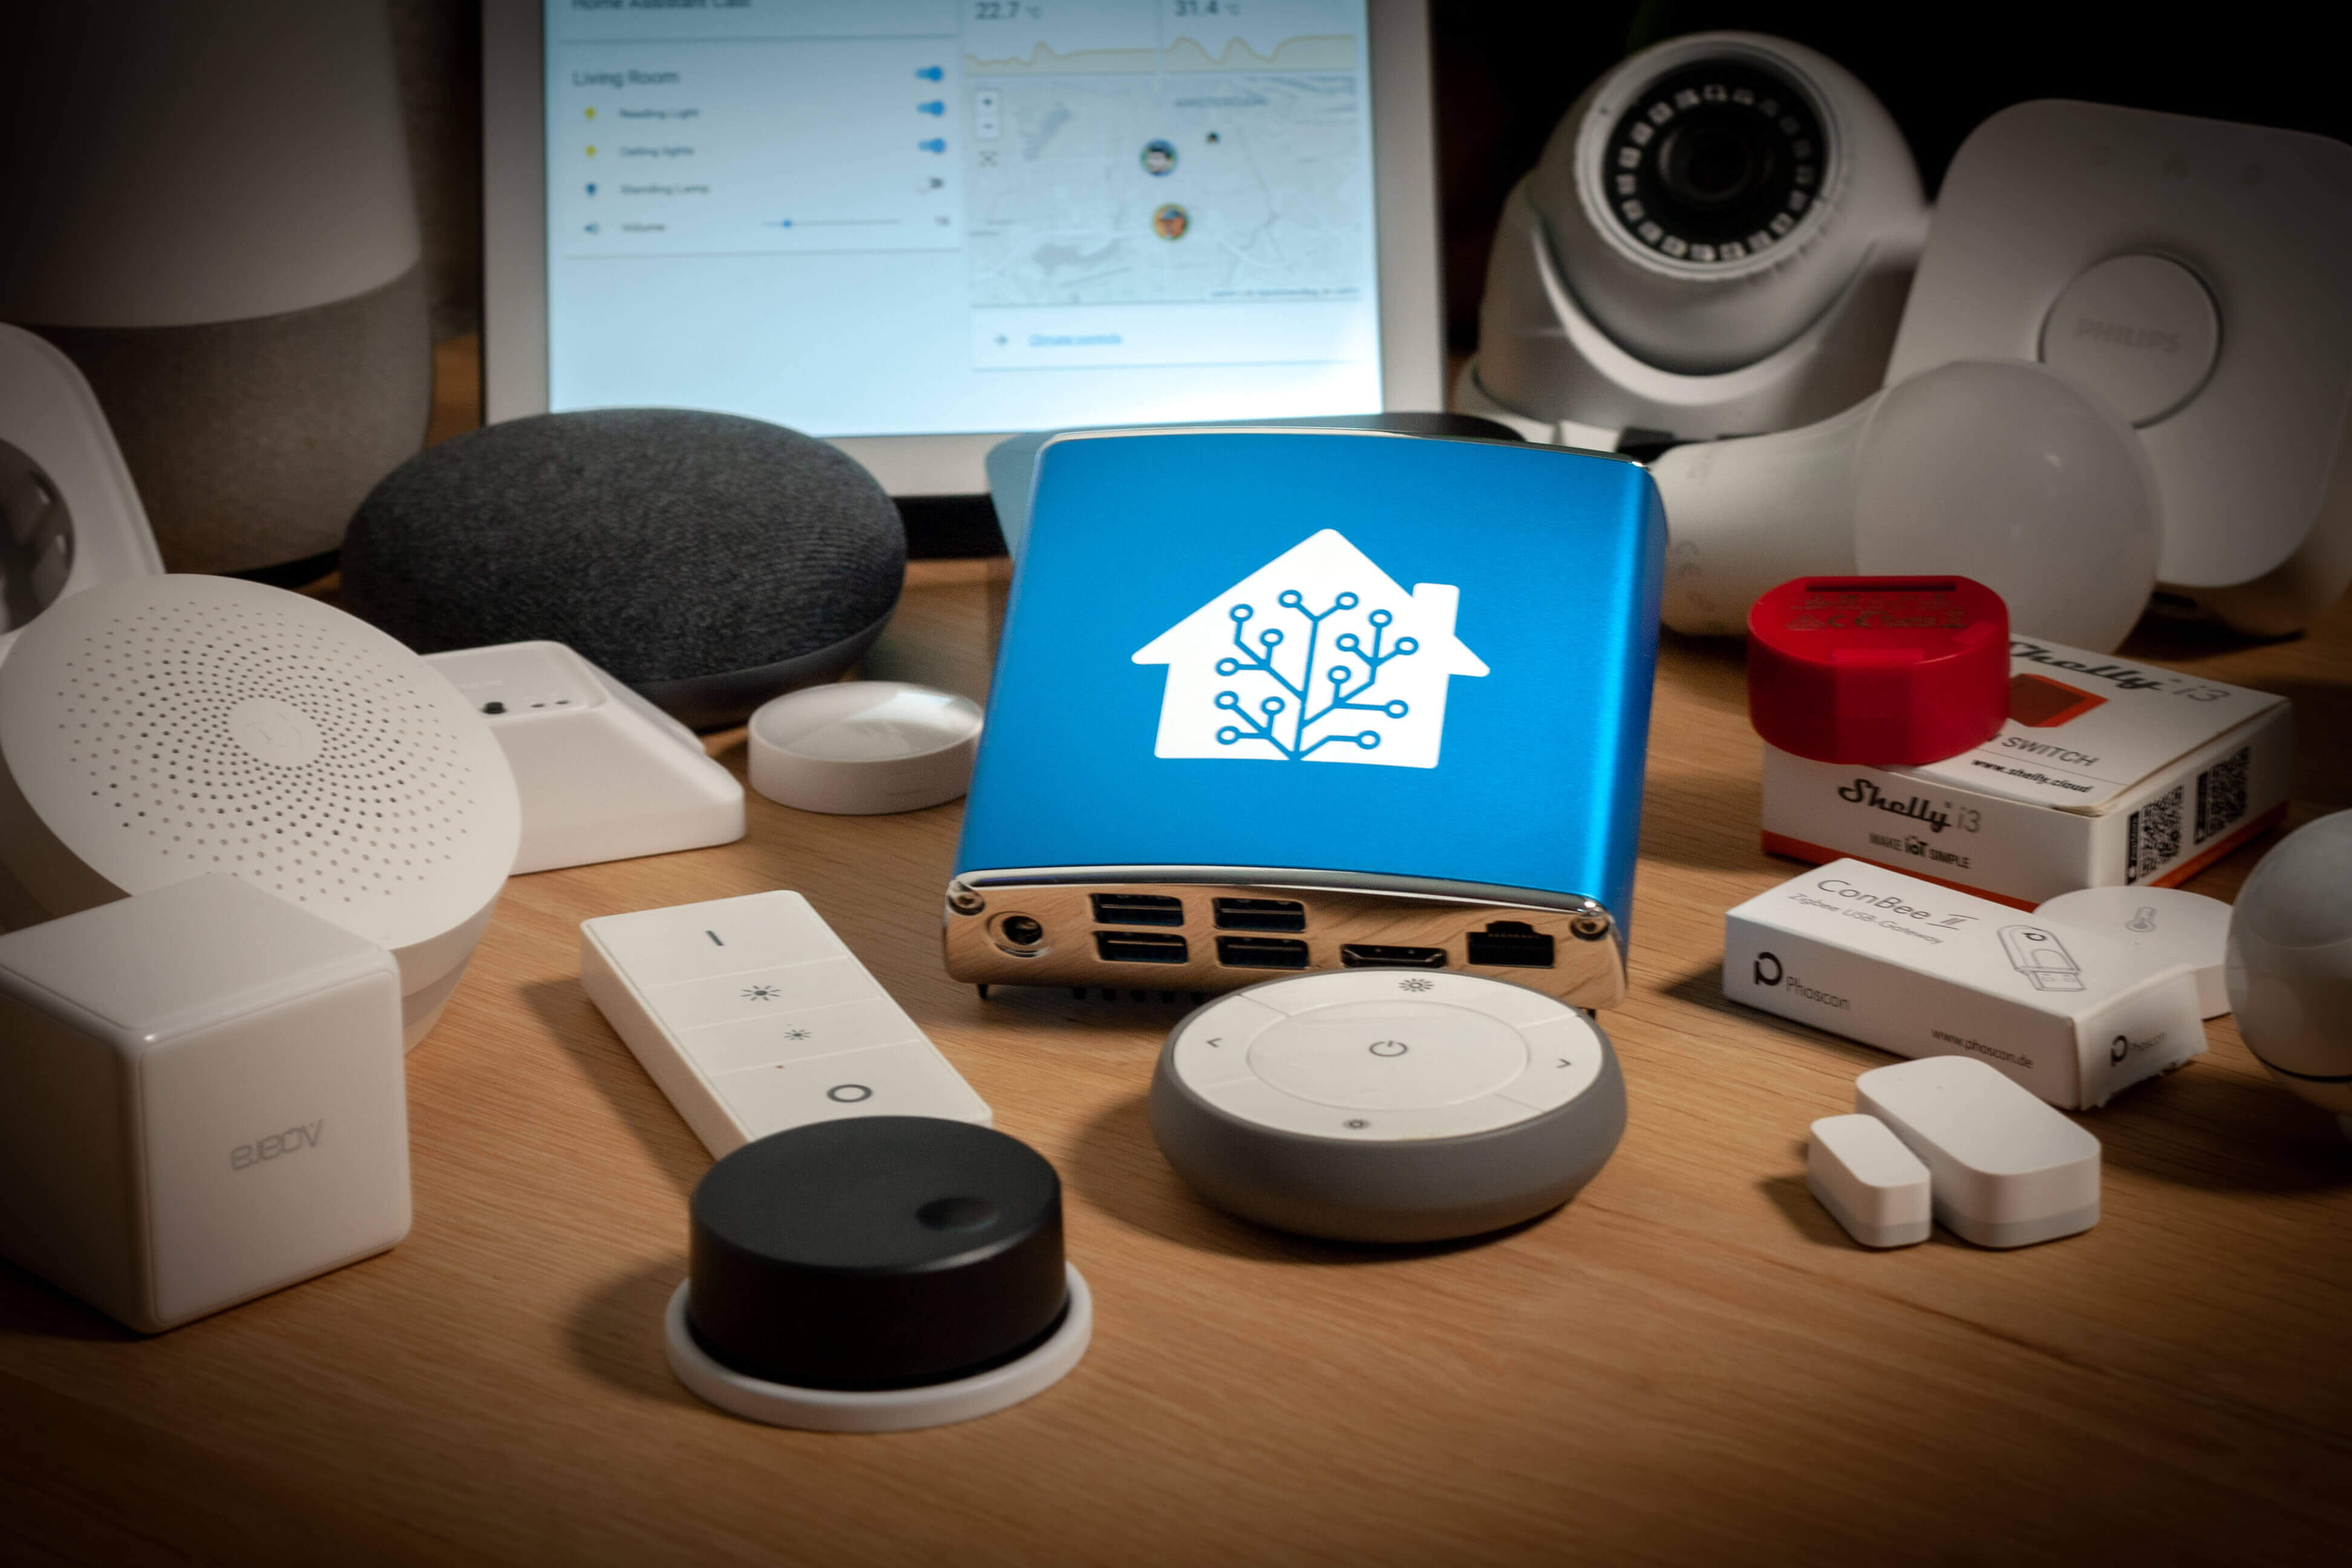
Luckily, aspirational smart home folks in 2021 have at least one viable alternative: Home Assistant. This piece of open source software is the proverbial ring “that in the darkness binds them.” It is the glue for smart home gear spanning all sorts of manufacturers, from behemoths like Google to minnows like Shelly. It’s a project that has set out to change all of the smart home pitfalls listed above by putting local control, privacy, and interoperability first.

By acting as a single configuration point for multiple ecosystems, Home Assistant is in a uniquely powerful place in the modern smart home. It is aware of the state of every entity in your home and can therefore do useful things like close the garage door if you left it open when you went to bed or left your defined home zone. I will never tire of having the lights automatically fade up one hour before sunset either.
If this sounds too good to be true—all the benefits of a smart home without the downside associated with off-the-shelf solutions—today is the day to see for yourself. Let’s walk through the building blocks required to put together your own self-hosted, subscription-free home automation system. Using the Home Assistant project as a foundation, we'll cover some must haves for new tech, highlight some of our favorite open source home automation projects, and give you a quick primer on how to put all of it together.

Home Assistant, the basics
Considering the title of this article, this note is a bit awkward. But when you initially choose to build out your smart home with the Home Assistant project, there is an optional $5 per month subscription. This is administered by the company behind the project, Nabu Casa, which was founded in 2018 to ensure the Home Assistant project remained sustainable. For the company, these fees allow Nabu Casa to pay a small number of staff. For you, the $5 per month fee enables your local Home Assistant instance to effortlessly work with popular cloud services like Google Home or Amazon Alexa, and it also permits access to Home Assistant from anywhere with minimal setup. That said, it is definitely possible to mirror both of these functions without the subscription by using a reverse proxy, if you like.
While there are other choices in this space such as Domoticz, OpenHAB, or Gladys, Home Assistant will be our focus today because it’s free, open, and has a *huge* community behind it. At the time of writing, it has over 1,700 integrations with all manner of devices, services, and hardware supported. Plus, it’s a regular feature of Github’s trending page, too.
Versatility is the true magic of Home Assistant. In effect, it speaks 1,700 different languages and brings them all into one place. Build a smart home ecosystem with Home Assistant at its core, and devices from completely different ecosystems can finally talk to each other. Would you like the lights to automatically turn off when you turn the kettle on? With Home Assistant, you can do that!
Let's look at a more realistic example of a useful automation based on this principle. Say you have two sets of lights on totally different circuits that you always want to be in sync, perhaps downstairs and upstairs hallway lighting. With Home Assistant monitoring the state of these entities, it can react and do things automatically. In other words, if light1 is on, then turn on light2.
Time for some key terminology: Home Assistant performs such actions when certain conditions are met or triggers occur. This allows the construction of complex logic such as "turn down the thermostat, ensure doors are locked, and all lights are off when the sun is below the horizon and no motion is detected for one hour or guest mode is not enabled.” Consider how many apps you'd have to open to do all that by yourself: an app for the thermostat, a smart lock, and motion detection via a camera or sensor at least.
Without some Home Assistant glue in the middle, most home devices aren't really “smart” or “connected.” They are remotely controllable, which is an important prerequisite for being automated, but that should not be conflated with automation.
Automation is your house reacting to the time of day, the weather, your presence, and so on without need to manually activate the devices every time. With Home Assistant flexing all its muscles, in theory it’s possible to build a home where you shouldn't need to touch a light switch or a thermostat because your automations are created with enough care and thought.
Starting up, the basics
Whether you're coming into this article as a veteran sysadmin or a weekend warrior, getting Home Assistant up and running has never been easier. Home Assistant publishes comprehensive getting started documentation, and all you need to dip your toe in is a Raspberry Pi.
In late 2020 the project launched its very own vision of what the perfect smart home hub should look like, Home Assistant Blue. It’s an ARM-based SBC based around the Odroid-N2+. It’s not cheap, starting at $159.95, but if you’re looking for a device that the project itself sees as the future, look no further.
There is a whole world of hardware possibilities, far too much to get into in the scope of this article, but the Pi 4 is a great place to start. It has a relatively low price tag, a good community with plenty of shared knowledge, and many pre-built images. If you start taking this stuff seriously, you might want to consider a dedicated Intel NUC, but I suspect you'll be pleasantly surprised how powerful a Pi can be. Just please don't rely on the SD card—use USB boot instead.
As always, make sure to ask yourself the question of risk versus reward when making a hardware purchase for a project like this. There's no need to spend $1,000 on redundant storage, UPS (uninterruptible power supplies), and so on just for a couple of lights. However, if your home security, heating, and lighting will be relying on Home Assistant, that price range might make more sense. Besides, you can pay for it using the money you saved on those cloud subscriptions, right?
Once your hardware choice has been made, start by downloading the Home Assistant image for your device, flash it using balenaEtcher, and boot it up. Technically, now you're already running Home Assistant. Congrats, a subscription-free automated home awaits!
Next, however, comes the hard fun part: adding individual hardware and actions to your burgeoning smart home. I’d suggest starting out by thinking of a problem or situation that affects your daily life that could be improved via automation. For me, lighting is one of the best projects for beginners because it's high reward, yet there is a low risk of causing harm if the setup malfunctions for some reason. Conveniently, there is already an easy Home Assistant example of how to create a simple automation to turn on some lights before sunset.
The automation engine built into Home Assistant uses two primary methods for configuration: YAML or a form-based approach. These YAML-based simple automations are a solid choice for more basic “if this, then that” situations. But sometimes you want more flexibility. And a form-based approach isn't always the most intuitive method for creating complex automations.
Speaking in node
In these instances, I turn to Node-RED, a browser-based flow editor. With this tool, you create nodes and connect them together to create an ordered sequence of events known as a flow. It's visually easy to understand even if it takes a little getting used to in the beginning.
Node-RED’s available nodes consist of many different types; their utility extends well beyond the confines of Home Assistant. People have used Node-RED to create entire Escape Room projects, because that’s the versatility and power on offer.
In Home Assistant land, the node types we have available to us include things like "Call Service," which calls up a standard Home Assistant service such as light.turn_on or notify.device or the more sophisticated "Function" node (which lets you drop down to raw Javascript if you have a particularly complex scenario).
For building out a smart home, it’s important to understand switch nodes, which essentially act like a conditional in traditional programming terms. These permit actions based on values just like an if statement would in code. For example, "if guest_mode is enabled then do X else do Y." In this example, guest_mode is an input_boolean in Home Assistant.
Toggling input_booleans is a powerful way to trigger flows in Node-RED from Home Assistant. Node-RED is plugged directly into the API of Home Assistant and can monitor every entity present and trigger flows when events occur, like state changes. A trigger can be as simple as a single light turning on or an entire sequence of conditions that must be met: "if this and this and this is true, then do that."
The Home Automation community has embraced Node-RED as one of its own. Delightfully, it’s available as a free Community Add-On for Home Assistant.
Imagining edge cases early on
The aforementioned guest_mode is a great example of an edge case. Presence detection is one of the coolest and most difficult things in Home Automation. Why run the AC or heat when you're not home? Or the lights? A common method is to use your phone's GPS capabilities or the fact that it is connected to the Wi-Fi to determine whether you're home or not (see how everything being able to connect to everything can be awesome?).
But with such setups often comes an edge case, and edge cases are the one true enemy of reliable automation. What happens when your mother-in-law comes to stay and doesn't want to learn the specific incantations required to operate your automation system? Easy. You’ll disable a whole bunch of things all at once with guest_mode.
Every automation you write will have edge cases, and how you deal with them sets apart a good automation from a great one. Luckily, the Home Assistant community has a Discord server for real-time assistance or, if you prefer, a community forum. Besides all the other things that make Home Assistant great in practice, the community has been a stand-out feature for me—few if any other smart home efforts have inspired such a passionate and knowledgeable user base.

The Bedtime Routine, or the importance of household buy-in
If you live by yourself, home automation is incredibly easy—the goal is to generate an ecosystem that suits your specific habits, wants, and needs. For everyone else, your smart home system may ultimately only be as useful as it is comfortable to use for the other people inhabiting the space.
In my case, spousal approval is the pivotal milestone for fully realizing a Home Automation project. And the bedtime routine was the project that shifted my wife's opinion from passive resignation to active interest.
Using Home Assistant and Node-RED, our house tells us when it's time to go to bed. The routine started out as a simple way to make sure that the lights and TVs were turned off and thermostats turned down overnight whilst we were sleeping. Now, it's evolved into a 20-30 minute sequence of ever-increasing complexity that shuts our house down each night.
There are a number of ways we trigger the routine: voice via Google Home, via app, or just because it’s the right time of day. Time of day (usually midnight) is actually a helpful reminder that we've been watching TV for a bit too long and should get some sleep. Even the dog is in on it at this point. When he hears the Google Home text-to-speech chime cheerfully announce "Bedtime routine initiated—20 minutes to lights out,” he jumps up from his bed and runs outside to do his business. (Yes, using Home Assistant, I've automated my dog.)
If neither my wife nor I have triggered bedtime manually at midnight, the lights briefly dim a couple of times by a few percentage points. It's subtle, but enough that you notice. Two minutes after that, the "bedtime routine running lights" come on and no matter what you're in the middle of, the TV shuts off. The running lights include all hallway lights, a few select room lamps, and the outdoor yard light for the dog. I also shut off a selection of smart plugs for devices that don't need to be on all night, like the garage door opener (which draws 8w at idle!), the washing machine (unless it's running), and my soldering iron.
Twelve minutes later, these lights dim to 25 percent—a strong indicator "you are definitely going to bed now aren't you?" The bedroom lamps are already on and waiting for us. If the ambient temperature in the bedroom is above a certain threshold, the ceiling fan is, too.
We're now at minute 20 since the routine began, and the running lights turn off, the dog flap locks, and the smart locks for the front and back doors engage. Outdoor lights all turn off, too—no matter their previous state, just to be sure.
Bedroom lamps at minute 22 dim to 20 percent. Five minutes after that, they briefly flash a couple of times between 10 and 20 percent, indicating the routine is almost done. This means it's time to get off your phone and put it on charge.
After 28 minutes, the bedtime routine is complete and an input_boolean in Home Assistant is flipped telling the house that we're in bed. Node-RED uses this value to determine whether or not to execute the time-based forced bedtime at midnight or not.
This little routine makes the house feel like it is working with us. It improves our quality of sleep and therefore makes our lives better. I had no idea just how powerful it was going to be when setting it up a couple of years ago. But I knew that the bedtime routine had been a true success when my wife jokingly lamented having to manually turn off the lights when we stayed in a hotel last year.
Each of these devices—from lights to thermostats to locks to smart plugs—are members of completely different ecosystems. But with Home Assistant, plus a little time with Node-RED, I'm able to make them all work together in harmony.
Actualizing automation: Some gear suggestions
How do you make sure you buy a device that’s going to be compatible with Home Assistant? There are a bewildering array of different standards to choose from as you probably already know.
The best place to start is the Home Assistant integrations page. Take care, though, as certain vendors will appear in the search results, but most integrations have caveats and gotchas. Specific models or firmware versions for the devices might be a requirement. For example, the popular Roborock S5 robot vacuum requires that you extract an API token from a rooted Android phone or that you follow a very specific set of steps.
Sometimes, the only way to know for sure that a device will work is by buying it and trying it. Other times, you’ll buy something without fully checking and be pleasantly surprised that it just works. Remember that these integrations are generally maintained by the community, not the vendors themselves. And it’s rare, but worth noting that sometimes you might run into a little turbulence when Home Assistant updates or the vendor retires an API. Such is the price we pay to leave the highly funded, well maintained, but ultimately limited and expensive walled gardens of the Googles or Amazons of the world. And it’s not like Google ever sunsetted a product, right?
One other fantastic resource for vetting specific items is YouTube, where a robust community of Home Assistant users has developed. Dr Zzzs, The Hook Up, Intermit.tech, Paul Hibbert, and DigiblurDIY are some of the most well-known Home Assistant channels, but that’s by no means an exhaustive list. The fact that multiple YouTube personalities have developed around Home Assistant guidance should give you an idea of how active this community is—plus, it means you can find plenty of material to work with if you’re in need of specific inspiration or buying advice.
But if you’d like a few specific recommendations, allow me to share some of the most vital Home Automation hardware for the Kretzschmar house.
The ESP8266, or building your own devices
When you need a very specific thing (say, a climate sensor to trigger actions for your thermostat), you can always build your own device if you are struggling to find something commercially. Building one needn’t only be the realm of super nerds; it’s more approachable now than ever.
I opted for the ESP8266, a cheap, Wi-Fi enabled, Arduino IDE compatible microcontroller. It requires you to write or obtain firmware and flash it to the device.
The recently acquired ESPHome project makes this entire process extremely easy. Write a little YAML, press compile, and then flash the ESP device. I hosted a live hack session on YouTube where many of the smaller intricacies are covered in more detail.
Here's an example of a code snippet to configure an ESP8266 D1 Mini with a DHT22 temperature and humidity sensor.
esphome:
name: sensor_basement_temp platform: ESP8266
board: d1_mini
wifi:
ssid: "iot"
password: "supersecret"
# Enable Home Assistant API
api:
password: "supersecret"
sensor:
- platform: dht
pin: D6
model: DHT22
temperature:
name: "Basement Temperature" humidity:
name: "Basement Humidity" update_interval: 30s
Building a whole house's worth of climate sensors is cheap and easy at under $10 per room. From there, using an aggregate function in Home Assistant makes it possible to have these devices feed into your thermostat. I always thought a centralized single point of measuring temperature was odd, but it’s an understandable technical limitation.
WLED
Another bit of useful custom Home Assistant gear is developer Aircookie's WLED RGB LED control firmware for ESP8266 or ESP32 boards.
Flashing a pre-compiled binary to a board takes a few minutes. And after doing this, the ESP board will create a Wi-Fi access point. Connect to the new hotspot, configure a few settings, and you’re good to go.
YouTuber Intermit.tech makes a device known as QuinLED, which has been the best way for me to create a DIY RGB fully controllable LED strip with some safety measures built in.
Tasmota
Tasmota, an open source firmware, was my gateway to the entire Home Automation scene. I purchased some Teckin SP20 smart plugs and flashed them with Tasmota using Tasmotizer, which uses a man-in-the-middle exploit to spoof the update servers and flash custom firmware to the devices.
This means that no matter what happens to Teckin as a company, the smart plugs I purchased will continue to work until they physically stop working.
Au revoir, light switches
Perhaps you've picked up on the fact that there are a lot of options in the DIY smart home space. Luckily, there are as many if not more resources to make your initial journey into the world of home automation as stress free as possible.
The choices on offer can seem more complex than the commercially available options to begin with; plug-and-play convenience is one of the biggest upsides to the costs of subscription services or ecosystem lock in. However, as you dive deeper with rolling your own smart house, these devices become part of your daily life. You’ll miss them when they're not there; hotels require light switches?!
In the end, it’d be easy to recommend a DIY smart home solution based around Home Assistant solely because it is cheaper financially. But an automation system that will last for decades—because it can scale, encompass multiple manufacturers, and withstand companies changing or dropping support—surely has to be built this way. In 2021, a flexible, future-proof smart home needs to center around open source software and devices that you own. Plus, once you power through the initial learning curve, having the ability to automate virtually any sequence you can dream up is really fun.
Most days, I give my entire home system no thought—and that's the way it could (and should) be.
Alex Kretzschmar (@ironicbadger) is an avid open source evangelist. He is co-host of the Self-Hosted podcast, co-founder of linuxserver.io, author of perfectmediaserver.com and works with OpenShift at Red Hat.
Listing image by Home Assistant
https://ift.tt/3cCPWth
Technology
Bagikan Berita Ini


0 Response to "How to achieve Smart Home nirvana (or, home automation without subscription) - Ars Technica"
Post a Comment